The Oregon State University Human Resources Office offers a multitude of resources, forms, and additional information to assist you in determining if remote work is an appropriate arrangement as the University continues to resume operations. For more information click the button below:
When working remotely, you no longer have all the protections that are in place at the office to keep your data safe from the bad guys. The following ten easy steps can help mitigate this change to your security posture. We’d ask you please do the following:
1. Use OSU’s cloud and VPN services (for systems that require it) when working remotely.
2. Keep your operating system current.
3. Be sure to use Anti-Virus and keep it up to date.
4. Turn on your host-based firewall.
5. Disable auto login.
6. Turn off file and print sharing.
7. Disable remote access and turn off any public folder.
8. Enable disk encryption, and write down that key. You may need later if there's a problem.
9. Update your applications and remove those that can’t be updated. Use auto-update settings if available.
10. Report any suspected data security incident, no matter how small. This includes phishing emails.
See the following Knowledge Base article for downloading and installing the Cisco AnyConnect VPN Client on your computer: https://oregonstate.teamdynamix.com/TDClient/1935/Portal/KB/ArticleDet?ID=51154
Note: The current version of Windows is Windows 10. If you are still using Windows 7 (or a previous version) it is no longer supported, and will not receive updates. Please upgrade to a current version.
To keep Windows 10 up to date:
Windows 10 comes with Windows Defender built in, which is kept up to date automatically. To check the status of Windows Defender, or to update threat definitions manually:
If you have installed a third-party anti-virus solution, please follow the manufacturer’s instructions for performing updates.
Windows 10 enables the host-based firewall by default, but you should verify that it is on. To do so:
This one should be easy. If you are using an account with a password, auto login is disabled by default in Windows 10. If not, please set up passwords for all accounts on the computer.
If auto login continues after setting up passwords, please contact the OSU Service Desk for assistance.
Disk encryption, called Bitlocker, is available on Pro and Enterprise versions of Windows 10. If it is available, please enable it.
Sorry, this might be a bit painful, and sometimes varies from application to application. But please note that using Windows Update only updates Windows itself, not the applications installed. For those, you’ll have to explore each application you’ve installed to insure it is up-to-date. In general, “check for updates” is found under Help in the applications menu.
We recommend that you check for updates on all applications on a monthly basis.
If you are the victim of a security-related issue, please use the following form to report it to OIS.
Report an Incident
See the following Knowledge Base article for downloading and installing the Cisco AnyConnect VPN Client on your computer: https://oregonstate.teamdynamix.com/TDClient/1935/Portal/KB/ArticleDet?ID=51154
For a list of all the useful cloud services OSU offers as well as which services require VPN, head to the Keep Working site.
This depends on which Anti-Virus you have installed. The instructions below are for Avira, a free anti-virus client which is recommended by the OSU Service Desk. If you have a different software, please consult the manufacturer’s website for update instructions.
If you don’t have an Anti-Virus installed, please install one. Avira is available for free from https://www.avira.com/en/downloads
In MacOS Catalina this should be on by default, but please verify:
This is likely on by default, but to verify:
Disk encryption protects the contents of your hard drive if your computer is lost or stolen. Apple uses a built in disk encryption product called FileVault.
Sorry, this might be a bit painful, and sometimes varies from application to application.
For any application that was purchased and installed through the App Store, you can simply launch the App Store, click on the Updates icon and install all updates.
For other applications, you’ll need to open the application itself and find how to update it. This varies. For Microsoft Office, click on Help in the Menu Bar and click on Check for Updates. For the Chrome web browser, simply clicking on Chrome in the Menu bar and selecting About Chrome will prompt an update check.
Taking a few moments to explore the Menu bar while in an application, or searching the internet for instructions on updating a particular application is a good approach.
We recommend checking for and updating all applications on a monthly basis.
If you are the victim of a security-related issue, please use the following form to report it to OIS.
Report an Incident
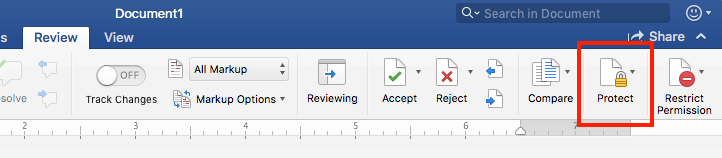
When sharing files containing confidential information via email, those files must be encrypted. This is relatively easy to do in Microsoft Office or Adobe Reader.
Important: When sharing the password you've chosen with the intended recipient, it should never be done via email since that would allow someone who gained access to your email account to decrypt the document. Use a different communication method such as phone, text, or some other secure messaging client.
If you find that you need to do this frequently, please contact the Office of Information Security for alternative solutions.


When doing any university related data storage and sharing, be sure to use your OSU Box account and not a personal one you may already have. This is especially true if it’s sensitive university data. When sharing these folders and files with others, be sure to share to their OSU Box accounts as well.

When you are sharing a file or folder, or emailing someone a link to a folder containing sensitive information, be sure to check that you are sending it to the correct person and not someone else with a similar name. An easy way to do this is through the Outlook contact cards. https://support.office.com/en-us/article/Find-people-and-contacts-f86874...
If you need to share confidential data we ask that you contact the Office of Information Security and we can work with you to find the best way to securely share your data.
It’s also good practice to only share files with the people who need access to them, keeping the pool of those with access as small as possible and up to date. If you regularly work with a group of people on things, it’s best to have a shared folder with them, where everyone can edit the documents directly within Box, using Office 365. Keeping the work within Box minimizes the risk of someone gaining access to any of those files saved to your local machine.

Box automatically encrypts the files you upload, but if you’re uploading sensitive information OIS recommends you encrypt it yourself first. This can be done easily in Microsoft Office products.
When uploading sensitive information, we require that you share the passwords to these files via phone or in person (anything other than email.)
If you accidentally delete something or find that you later need something you previously deleted, it can often be recovered if it’s within a couple months. Try looking in the trash folder first.
The login uses your ONID account, so if someone asks for your Box account password it’s probably phony. The storage is also unlimited so any email saying you’ve reached your quota and your account will be shut down is also likely a phishing attempt. For the safest experience, please use DUO two-step authentication.